
Are you ready to join the buzzing world of beekeeping for beginners? Whether you have a green thumb or simply adore the idea of having your own bees, this ultimate beginner’s guide is here to equip you with all the knowledge you need to confidently embark on your beekeeping journey. From setting up your bee hive to harvesting honey, we’ll walk you through each step with easy-to-follow instructions and expert tips.
In this blog, we’ll cover everything you need to know to get started and create a thriving hive. We’ll discuss the importance of choosing the right location, the need for at least one queen in your hive, obtaining beekeeping supplies, and maintaining your bee hive. You’ll find valuable advice on managing honey bee queens, addressing common questions and concerns often encountered by beginner beekeepers, and harvesting honey.
With our comprehensive guide, you’ll gain the confidence and insight needed to become a successful beekeeper. So, put on your bee suit, grab your smoker, and get ready to experience the sweet rewards of beekeeping firsthand. Let’s dive in and discover the fascinating world of bees together!
Introduction to Beekeeping
Are you ready to embark on an exciting journey into the captivating world of beekeeping? Exploring the wonders of beekeeping can be an incredibly rewarding experience, allowing you to connect with nature, contribute to the environment, and enjoy sweet rewards in the form of your own delicious honey.
In this comprehensive beginner’s guide, we will equip you with all the essential knowledge and confidence needed to kickstart your beekeeping adventure. Whether you live in a rural area or an urban setting, this guide will provide you with the necessary steps and insights to ensure a successful and thriving hive.
Beekeeping offers numerous benefits beyond just honey production. By nurturing and caring for these remarkable creatures, you can play a part in pollinating plants, promoting biodiversity, and supporting the delicate balance of our ecosystems.
Throughout this guide, we will delve into various aspects, from understanding the basics of beekeeping to harvesting your very own honey. You will learn essential safety precautions, explore the lifecycle of honey bees, and gain insights into setting up your bee hive in the perfect location.
With the information shared here, you’ll be well-prepared to confidently embark on your beekeeping journey. So, let’s dive in and discover the captivating world of beekeeping together, starting with the fundamentals that will lay the foundation for your success.
Remember, beekeeping is not just a hobby—it’s a commitment to the well-being of these incredible creatures. So, get ready to experience the joy of beekeeping and see your hive flourish as you embark on this incredible adventure.
Learning About Beekeeping for Beginners
Beekeeping is a fascinating and rewarding hobby that allows you to connect with nature while also playing a vital role in supporting the environment. As a beginner beekeeper, understanding the key principles of beekeeping is essential to ensure a successful and enjoyable experience.
Importance of Safety Precautions
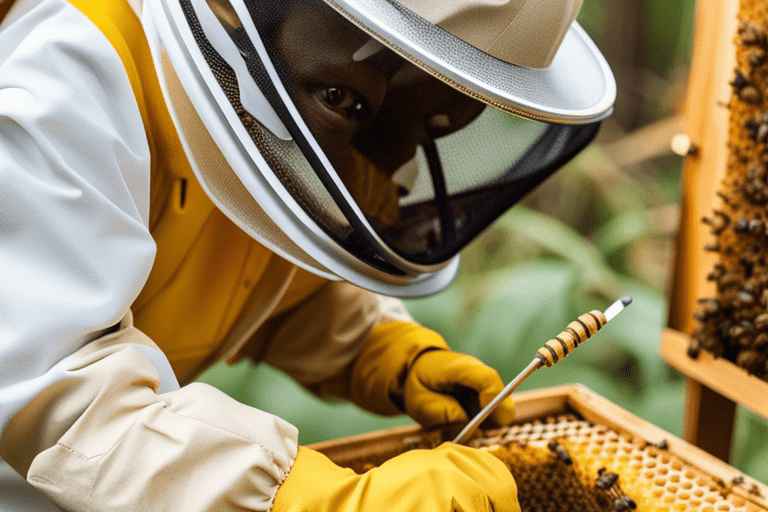
Before diving into beekeeping, it’s crucial to prioritize safety. Bees are generally docile creatures, but they can become defensive if they feel threatened. Always wear appropriate protective clothing, including a beekeeping suit, gloves, and a veil, to minimize the risk of stings. It’s also important to have a bee sting kit on hand in case of an allergic reaction.
Understanding the Lifecycle of Honey Bees
To effectively care for bees, it’s crucial to understand their lifecycle, especially the roles of honey bee queens. A honey bee colony consists of three key members: the queen, the worker bees, and the drones. The queen’s primary role is to lay eggs, while worker bees perform various tasks within the hive, such as gathering nectar and pollen, building and maintaining the hive, and tending to the brood. Drones, on the other hand, are male bees whose sole purpose is to mate with the queen.
Hive Components and Maintenance
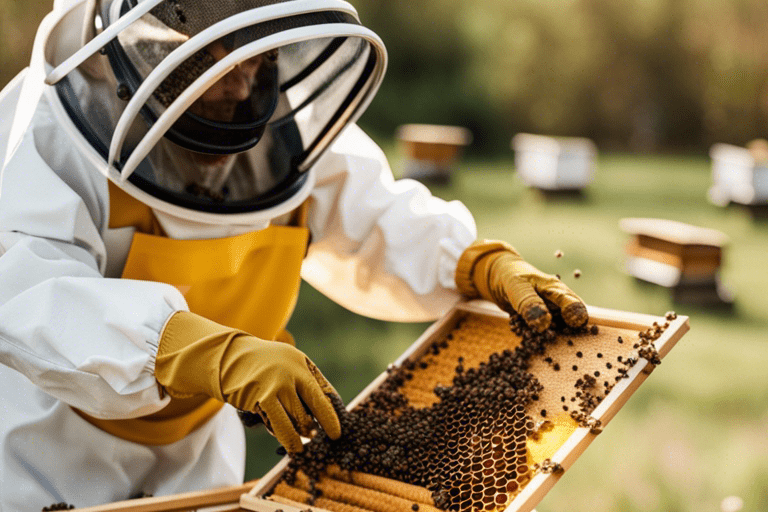
A beehive consists of several components, including the brood box, supers, frames, and foundation. Understanding the purpose of each component and how they fit together is vital for hive management. Regular hive inspections are essential to ensure the health and productivity of the colony. During inspections, you’ll check for signs of a healthy queen, brood development, and whether the bees have sufficient food stores to collect nectar and pollen. It’s also important to monitor for common issues, such as pests and diseases, and take appropriate action if necessary.
Resources and Education
In the journey of becoming a beekeeper, remember that there is always more to learn. Joining local beekeeping clubs or online communities can provide valuable resources, mentorship opportunities, and a platform to connect with experienced beekeepers who can offer guidance and answer any questions you may have. Additionally, there are numerous books, websites, and informative videos available that can deepen your knowledge and help you stay up-to-date with the latest beekeeping practices.
Remember, beekeeping is a journey of continuous learning and discovery. By immersing yourself in the principles of beekeeping, prioritizing safety, and actively seeking educational resources, you’ll embark on a rewarding and fulfilling beekeeping adventure.
Where to Place Your Beehive
When it comes to beekeeping, the location of your beehive plays a crucial role in the success of your colony. Choosing the right spot for your hive is important for the well-being of your bees and the productivity of your hive. Consider the following factors when deciding where to place your beehive:
Sunlight
Bees thrive in sunlight, so it is essential to find a spot that receives ample sunlight throughout the day. Aim for at least six hours of direct sunlight. The warmth of the sun helps bees to regulate the temperature inside the hive and stimulates brood production.
Accessibility
Ensure easy access to your hive for regular inspections, maintenance, and honey extraction. Choose a location that provides enough space around the hive for you to work comfortably. Additionally, make sure there are no obstacles, such as overgrown vegetation or tall structures, that could hinder your access to the hive.
Surroundings
Take into account the surroundings of your beehive. Ideally, the area should have a diverse range of flowering plants that provide nectar and pollen for your bees. Avoid placing your hive in areas that are heavily sprayed with pesticides or near potential sources of contamination, such as industrial sites or waste disposal areas.
Protection from Elements
Protect your hive from strong winds by placing it in a sheltered area, such as near a fence, building, or dense vegetation. This helps to prevent the hive from toppling over and protects the bees from cold drafts. Additionally, ensure the hive is situated on an elevated surface to prevent water accumulation during heavy rainfall.
Land Ownership and Legal Considerations
Before installing your beehive, make sure you have permission to keep bees on the property. Check local regulations and ordinances regarding beekeeping to ensure compliance. Some areas may require permits or have specific zoning restrictions, so it’s essential to do your research beforehand.
Remember, each apiary location is unique, and what works for one beekeeper may not necessarily work for another. It’s essential to monitor the performance of your hive and make adjustments if needed. By carefully considering sunlight, accessibility, surroundings, protection from elements, and legal considerations, you can provide your bees with the best possible environment for thriving and producing honey.
> “The right location for your beehive sets the stage for a successful and productive beekeeping experience.”
Comparing Nucs and Package Bees
When it comes to acquiring honey bees for your beekeeping venture, you have two primary options: nucs (short for nucleus colonies) and package bees. Each option has its own advantages and considerations, so it’s important to understand the differences before making a decision.
Nucs:
Nucs are small and established colonies that consist of several frames containing bees, brood (developing bees), food, and a queen. Here are some key points to consider when it comes to nucs:
– Established Colony: Nucs offer a head start as they already have an established colony with a laying queen, which means they are more likely to grow quickly and produce honey sooner.
– Stability: With a nuc, you’re introducing an established and balanced population of bees, reducing the risk of colony failure compared to starting with a smaller package of bees.
– Price: Nucs are typically more expensive than package bees due to the fact that they come with an existing queen, brood, and a stronger set of bees.
Package Bees:
Package bees are a bundle of bees (around 10,000-15,000) and a mated queen that are sold and delivered in a screened package. Here are some considerations when it comes to package bees:
– Flexibility: Package bees allow you to start from scratch, giving you control over the Hive’s foundation and development. You have the opportunity to build a relationship with your bees from the ground up.
– Lower Cost: Package bees are generally less expensive than nucs, making them a more budget-friendly option for beginner beekeepers.
– Establishment Challenges: It’s important to note that when you introduce package bees, you’ll need to take extra care to ensure they successfully establish their colony. They need time to build comb, grow their population, and establish brood.
Ultimately, the choice between nucs and package bees depends on your specific goals, resources, and level of comfort. Nucs provide a head start with an established colony, while package bees allow for a more hands-on and cost-effective start. Consulting with experienced beekeepers or local beekeeping clubs can provide further insight and guidance tailored to your specific circumstances.
Ordering Honey Bees
Ordering honey bees for your beekeeping venture is an important step towards establishing a thriving hive. Finding reputable suppliers and selecting the right time to introduce the bees to your hive are crucial factors for success. Here are some valuable guidelines to help you navigate the process of ordering honey bees:
Finding Reputable Suppliers
When you start a hive, it’s important to get your honey bees from reliable and trustworthy suppliers. Consider the following options:
1. Local Beekeeping Associations and Clubs: Reach out to your local beekeeping community for recommendations on reputable suppliers. They can provide valuable insights based on their experiences.
2. Online Suppliers: Many reputable suppliers offer honey bees for sale online. Ensure that they have positive reviews from other beekeepers and provide high-quality, healthy bees.
3. Beekeeping Conferences and Events: Attend beekeeping conferences and events where vendors often showcase their bees. This allows you to personally inspect the bees and make an informed decision.
Determining the Right Time
When you get into backyard beekeeping, the timing of ordering honey bees is crucial to ensure their successful integration into your hive. Consider the following factors:
1. Local Climate: Purchase bees that are adapted to your local climate. Consult experienced beekeepers or your local beekeeping association to determine the most suitable bee species for your region.
2. Availability: Honey bees are typically available for purchase in the early spring. Place your order well in advance to secure bees during the peak season.
3. Hive Preparation: Ensure that your bee hive is fully set up and ready before the arrival of the bees. This includes having the necessary equipment, frames, and sufficient food reserves.
Remember, ordering honey bees requires careful planning and consideration. By choosing reputable suppliers and timing your order correctly, you can ensure the successful establishment of your beekeeping venture.
Gathering Beekeeping Supplies, Tools, Equipment, and Clothing
When it comes to successful beekeeping, having the right supplies, tools, equipment, and clothing is crucial. Here are the essential items you’ll need to ensure a smooth and effective beekeeping experience:
Beekeeping Suit or Protective Clothing
A beekeeping suit or protective clothing is a must-have to keep you safe during hive inspections and honey harvesting. It typically includes a comfortable full-body suit with a veil, gloves, and sometimes boots. Choose a suit made of thick, light-colored fabric that offers maximum protection and visibility.
Smoker and Fuel: these are some of the equipment you will need for beekeeping.
A smoker is an essential tool used to calm the bees during inspections. It produces cool smoke that masks alarm pheromones released by the bees, keeping them calm and reducing the risk of stings. Bee-friendly fuels like pine needles or wood chips are commonly used in smokers.
Hive Tool
A hive tool is a versatile instrument used for prying, lifting, and scraping hive components. It helps with separating frames, loosening propolis, and removing excess beeswax. Choose a durable and well-designed hive tool that fits comfortably in your hand.
Bee Brush
A soft-bristled bee brush is used to gently remove bees from frames without harming them. It is handy for clearing bees when inspecting and manipulating the hive. Look for a brush with natural bristles to avoid damaging the delicate bees.
Bee Feeder
A bee feeder is essential for providing supplemental food to the bees, especially during times when nectar availability is low. In beekeeping 101, you can learn about various types of feeders, including entrance feeders, top feeders, and frame feeders. Choose one that suits your hive setup and makes feeding convenient.
Hive Components
You’ll need hive components such as deep and medium-sized boxes (supers) to house the frames where bees store honey, pollen, and brood. Additionally, frames, foundation sheets, queen excluders, inner covers, and outer covers are essential for maintaining a functional hive structure.
Beekeeping Gloves
Beekeeping gloves provide an extra layer of protection for your hands. Opt for gloves that are thick but flexible, allowing you to maintain dexterity while working with the bees. Make sure they cover your wrists to prevent bees from getting inside.
Beekeeping Veil
Along with a full-body suit, a beekeeping veil protects your face and head from bee stings. Choose a veil made of fine mesh that offers excellent visibility and fits securely around your neck to prevent any gaps. This is one type of equipment you will need.
First Aid Kit
Having a well-stocked first aid kit on hand is essential for any potential beekeeping mishaps. Include items like antihistamines for allergic reactions, adhesive bandages, tweezers, and a bee sting scraper.
Additional Tools and Equipment
Other tools and equipment that can be handy include a beekeeping smoker refueling container, a frame grip for easier frame handling, a queen marking kit for identifying the queen, and a frame rest to keep frames off the ground during inspections.
Remember, investing in quality beekeeping supplies and equipment is crucial for your success, even if you’re just starting with a single bee. Always choose items that are durable, bee-friendly, and suitable for your specific needs. With the right tools and equipment, you’ll be well-prepared to embark on your beekeeping journey.
Installing Honey Bees in a New Bee Hive
Installing honey bees in a new bee hive is a crucial step in starting your beekeeping journey. By following the proper techniques and ensuring a smooth transition, you can help your bees establish a healthy and productive hive. Here’s a step-by-step guide to help you through the process:
1. Preparation:
Before the arrival of your honey bees, make sure the hive setup is complete. To get started with backyard beekeeping, ensure that all hive components, including the bottom board, deep supers, frames, and outer cover, are in place. While starting with two hives might seem convenient, you need at least one healthy queen; it’s essential to have a solid foundation for your bees.
2. Choose the Right Time:
Select a day with mild weather conditions for installing the honey bees. Avoid days that are too hot, cold, or windy, as these conditions can stress the bees during the transition.
3. Spray the Bees with Sugar Water:
To calm the bees, prepare a solution of equal parts water and sugar. Spray this mixture lightly on the bees before transferring them into the hive. The sugar water not only provides a calming effect but also encourages the bees to remain in the hive.
4. Introduce the Bees:
Carefully open the package or nuc containing the honey bees. If you have a package, remove the can of sugar syrup and the queen cage. In the case of a nuc, make sure the frames are securely fastened.
5. Queen Introduction:
If you have a queen cage, slowly remove the cork from one end and replace it with a mini marshmallow. Hang the queen cage between two frames in the hive. This allows the worker bees to gradually release the queen, ensuring they accept her.
6. Transfer the Bees:
Gently pour the bees from the package or nuc into the hive. Avoid shaking or agitating them, as this can cause unnecessary stress. Carefully place the frames back into the hive, ensuring they are aligned and properly spaced.
7. Close the Hive:
Once all the bees are transferred, close the hive by placing the inner cover and outer cover securely. Make sure there are no gaps or openings that could allow predators or unfavorable weather to enter.
8. Provide Sugar Syrup:
To help the bees settle into their new home, provide them with a source of nutrition. Fill a feeder with a mixture of water and sugar, and place it near the hive. This will provide the bees with the energy they need to get started.
9. Monitor and Protect:
Regularly check the hive to ensure the bees are settling in well. Watch for signs of a healthy queen, such as the presence of eggs and young brood. Protect the hive from pests, predators, and adverse weather conditions to give your bees the best chance of success.
Remember, patience and proper installation are key when installing honey bees in a new hive. By providing a calm and welcoming environment, you set the stage for a thriving bee colony. Happy beekeeping!
Regular Bee Hive Checks
Regular hive inspections are crucial for maintaining healthy and thriving bee colonies. As a beginner beekeeper, developing a routine for these inspections, such as checking for honey bee queens, is essential to ensure the well-being of your bees and to catch any issues early on. In this section, we will discuss the importance of regular hive checks, how to conduct them effectively, and what to look out for during these inspections.
Why Regular Hive Checks are Important
Regular hive checks serve multiple purposes in beekeeping. They allow you to monitor the overall health of the colony, assess the queen’s performance, manage population growth, and address any potential problems promptly. By conducting inspections at regular intervals, you can maintain a proactive approach to beekeeping and take preventive measures to prevent disease outbreaks or hive failure.
Conducting Effective Hive Inspections
When conducting a hive inspection, it is important to approach the process with care and respect for the bees. Here are the steps to follow for an effective hive check:
1. Choose the right time: Conduct inspections on warm and sunny days when the bees are active and less likely to become agitated.
2. Smoke the entrance: Use a bee smoker to calm the bees before opening the hive. This minimizes defensive behavior and makes the bee inspection process more manageable. Remember to start with two bees.
3. Wear protective clothing: Put on your beekeeping suit, gloves, and veil to protect yourself from stings while handling the hive.
4. Open the hive gently: Remove the hive cover and any inner covers or supers, making sure to work slowly and avoid crushing bees.
5. Observe the frames: Carefully lift each frame and inspect it for brood development, honey storage, and overall health. Look for signs of pests, diseases, or abnormalities.
6. Check the queen’s presence: Look for the queen or evidence of her presence, such as eggs, larvae, or recently laid eggs. This confirms that the hive is functioning well.
7. Monitor population and food stores: Assess the population size and the amount of stored honey and pollen. Ensure that the bees have enough resources for their needs.
8. Address any issues: If you notice any signs of disease, pest infestations, or queen problems, take appropriate action based on beekeeping best practices or seek advice from experienced beekeepers.
Signs of a Healthy Hive
During your regular hive inspections, it is essential to identify signs of a healthy and productive hive. These include:
– A strong and active population of worker bees
– Evidence of brood development (eggs, larvae, capped brood)
– Well-organized and tightly sealed honeycombs
– Sufficient food stores (honey and pollen)
– Calm and docile behavior of the bees
If you observe these indicators, it signifies a thriving and successful colony.
Remember, regular hive checks are an ongoing process throughout the beekeeping season. By being diligent in your inspections, you can catch any issues early, ensure the health of your bees, and take necessary actions to maintain a successful beekeeping journey.
Keeping a Beekeeping Journal
Keeping a beekeeping journal is a valuable practice for both beginner and experienced beekeepers. It serves as a record of your beekeeping journey, allowing you to track hive progress, record observations, and plan future actions. By consistently maintaining a journal, you can gain valuable insights and improve your beekeeping skills over time. Here are some benefits of keeping a beekeeping journal:
Tracking Hive Progress
In your journal, document important milestones in your hive’s development. Record the date of hive installation, the queen’s arrival, and any significant changes or events. Becoming a beekeeper involves tracking hive progress, monitoring the growth and health of your bees, and identifying patterns or issues that require attention.
Recording Observations
As part of your beekeeping 101, use your journal to record observations during hive inspections. Note the presence of brood, the amount of honey stores, and any signs of disease or pests. Documenting these observations allows you to spot trends, identify potential problems, and make informed decisions for hive management.
Planning Future Actions
A beekeeping journal provides a platform for setting goals and planning future actions. Based on your observations and experiences, jot down ideas for improving hive conditions, implementing new techniques, or expanding your apiary. This way, you can track your progress and ensure continuous growth and development as a beekeeper.
Enhancing Learning and Knowledge
Reviewing your journal entries can help you identify patterns, evaluate the success of different approaches, and deepen your understanding of beekeeping. Additionally, your journal can serve as a valuable resource for self-reflection and a reference guide for future reference.
Maintaining a beekeeping journal is a simple yet effective way to organize and optimize your beekeeping efforts. Whether you prefer a traditional notebook or a digital platform, the act of recording your experiences and observations will contribute to your growth as a knowledgeable and successful beekeeper. Happy journaling!
Harvesting Honey from Bee Hives
Harvesting honey from your bee hives is an exciting and rewarding process that marks the culmination of your hard work as a beekeeper. In this section, we will guide beginners through the honey harvesting process, providing step-by-step instructions to ensure a successful harvest and delicious honey for your enjoyment.
Recognizing Ripe Honeycombs
Before harvesting honey, it is crucial to determine if the honeycombs are ready for extraction. Ripe honeycombs are capped with beeswax, indicating that the honey has reached its desired moisture content. Look for uniformly sealed cells and a golden color throughout the comb, signs that the honey is fully ripened and ready to be harvested.
Extracting Honey from the Frame
To begin the extraction process, remove the honey frames from the hive carefully. Brush off any bees gently, ensuring not to harm them. Once the frames are free of bees, use a hot knife or uncapping tool to remove the beeswax caps from the honeycomb cells. In the bee biology lesson of a beekeeping course, you can understand how this exposes the honey for extraction.
Honey Extraction Methods
There are various methods available for extracting honey from the frames. One common method is using an extractor, which uses centrifugal force to separate honey from the comb. Place the uncapped frames inside the extractor, and through spinning, the honey is forced out of the cells and collected in the extractor’s reservoir.
Alternatively, crush and strain method can be used. Crush the honeycomb using a honey press or by hand, allowing the honey to drain through a fine mesh sieve or filter into a container. This method is suitable for small-scale beekeepers or those without access to an extractor.
Storing Harvested Honey
Once the honey is extracted, it should be filtered to remove any impurities or beeswax residue. Use a fine mesh or cheesecloth to strain the honey as you transfer it into clean, dry jars or containers. Ensure the containers are tightly sealed to prevent moisture absorption.
Proper honey storage is vital to maintain its quality. Store the harvested honey in a cool, dry place away from direct sunlight. The ideal temperature for honey storage is around 70°F (21°C). With proper storage, honey can remain delicious and fresh for months to come.
Conclusion
Harvesting honey from your bee hives is a rewarding experience that allows you to enjoy the fruits of your beekeeping endeavors. By following these steps, beginners can successfully extract, filter, and store their own honey. So grab your beekeeping suit, prepare your tools, and get ready to savor the sweet rewards of beekeeping!
Remember, as a beekeeper, it is essential to prioritize the well-being of your honey bees throughout the harvesting process. Ensure you leave enough honey for the bees to sustain themselves and carry them through the colder months. Happy honey harvesting!
How much does it cost to start beekeeping?
Starting beekeeping can be an exciting and rewarding venture, but it’s important to understand the cost considerations involved before diving in. Here are the key expenses to keep in mind when beginning your beekeeping journey:
Hive Setup:
– Beehive: The main component of your beekeeping setup is the beehive itself. Depending on your preferences and the type of hive you choose, such as the Langstroth bee hive, the cost can range from $100 to $300 or more.
– Hive Accessories: You’ll need additional equipment and accessories for your beehive, including frames, foundation sheets, inner covers, outer covers, and hive tools. These items can cost around $50 to $100.
Bee Purchases:
– Package Bees: If you decide to purchase package bees, which typically include a queen and a group of worker bees, the cost can range from $100 to $150 per package.
Nucleus Colonies (Nucs): Electing to purchase nucs, which are small starter colonies with more bees and resources, is a common choice in beginning beekeeping. Nuc prices can vary but generally range from $150 to $200.
Ongoing Expenses:
– Protective Clothing: It’s essential to invest in protective clothing to ensure your safety while working with the bees. A beekeeping suit, veil, gloves, and sturdy boots can cost around $100 to $200.
– Beekeeping Tools: You’ll need various tools for hive inspections and maintenance, including a smoker, hive tool, bee brush, and queen rearing equipment. These tools can amount to an additional $50 to $100.
– Medications and Treatments: To maintain the health of your bees, you may need to purchase medications and treatments for common bee diseases and pests. These costs can vary depending on your specific needs but typically range from $50 to $100 per year.
– Feeding Supplies: In some cases, you may need to provide supplemental feed for your bees, particularly during periods of low nectar flow. Feeders and sugar syrup can cost around $20 to $50.
Remember, these figures are estimates, and actual costs may vary depending on factors like location and the size of your operation. It’s also worth joining a local beekeeping club or seeking guidance from experienced beekeepers who can provide additional insights and cost-saving tips. Beekeeping can be a fulfilling and educational hobby, so consider these expenses as an investment in your journey as a beekeeper.
Keep in mind that the initial costs may be higher, but as you gain experience and establish your bee colonies, the ongoing expenses are usually reduced. With proper care and attention, your beekeeping venture can eventually yield its own sweet rewards in the form of the bounty of honey and the satisfaction of nurturing these incredible creatures.
How many acres do you need for beekeeping?
Beekeeping is a versatile and adaptable hobby that can be enjoyed in a range of settings, including small properties and even urban areas. The amount of land needed for beekeeping depends on various factors, such as the number of beehives, local regulations, and available forage resources.
Urban Beekeeping: This is for people who don’t want to go to a rural area to keep bees.
Contrary to popular belief, beekeeping is possible in urban settings. Bees have the ability to thrive in small spaces, such as balconies, rooftops, and backyard gardens. With careful management and proper placement of beehives, urban beekeepers can contribute to the health of local ecosystems and enjoy the rewards of honey production. Local regulations regarding beekeeping should be consulted to ensure all requirements are met.
Small Acreage
If you have a small property, you can still keep bees successfully. In fact, with just a few acres of land, you can maintain several beehives and achieve a thriving beekeeping operation. Be sure to consider factors like the availability of flowering plants and water sources in your vicinity to support the bees’ foraging needs.
Forage Availability
The key to successful beekeeping is ensuring an adequate supply of nectar and pollen for honey bees. While having more acreage can potentially provide a greater variety of forage resources, it is not strictly necessary. Even with limited land, you can strategically select bee-friendly plants and create a garden or flowering area that provides abundant nutrition for your bees.
Remember, the quality and diversity of forage is more important than the sheer size of the land. By cultivating a diverse range of flowering plants and maintaining a pesticide-free environment, you can ensure that your bees have access to a rich and healthy forage source.
So, whether you have a large rural property or a small urban space, beekeeping is an accessible hobby that offers numerous benefits for both bees and beekeepers. With proper planning and management, you can enjoy the wonders of beekeeping on any scale.
> “Beekeeping is a versatile hobby that can be enjoyed on small properties and even in urban areas. By providing a diverse range of forage and carefully managing your beehives, you can create a thriving beekeeping operation regardless of the acreage.”
How many bee hives should a beginner beekeeper start with?
Determining the number of bee hives suitable for a beginner beekeeper involves several factors that should be carefully considered. While there’s no one-size-fits-all answer, you need to gauge the amount of time you can dedicate to beekeeping along with the equipment you will need.
Time commitment
Beekeeping requires regular attention and care, especially during certain seasons. Each hive requires inspections, maintenance, and supervision. Starting with too many hives may overwhelm a beginner and compromise the quality of care they can provide. It’s advisable to start with a manageable number, such as two or three hives, to learn and adapt to the responsibilities gradually.
Available resources
Consider the resources you have available, including the space to accommodate the hives and the financial investment required. Each hive needs enough foraging area, ensuring bees have access to food sources and water. It’s essential to have adequate beekeeping equipment, including hive components and protective gear. Starting with a few hives allows you to allocate resources effectively and learn from experience before expanding.
Personal goals and ambitions
Take into account your personal goals and ambitions as a beekeeper. Are you looking to take a bee primarily for personal enjoyment, or are you interested in producing honey for friends, family, or potential customers? Starting with a few hives enables you to assess your level of interest and dedication while gradually building up your apiary if desired.
By starting with a small number of hives, beginner beekeepers can develop essential beekeeping skills, gain confidence, and learn from any challenges they encounter. As your experience and knowledge grow, you can gradually expand your beekeeping operation if it aligns with your goals and available resources. Remember, beekeeping is a journey of continuous learning and discovery, so enjoy the process and savor the rewards of being a proud beekeeper.
Do Beekeepers get stung by honey bees?
Beekeepers often face the concern of bee stings while caring for their honey bees. However, with the right approach and precautions, the risk of stings can be minimized. It’s important to remember that honey bees sting as a defense mechanism and not as an act of aggression. Here are some key tips to reduce the chances of getting stung:
1. Wear Proper Protective Clothing
Using the appropriate beekeeping suit, veil, and gloves is essential for shielding yourself from bee stings. A high-quality beekeeping suit should cover your entire body, with elasticized cuffs and ankle straps to prevent bees from entering. Ensure that the veil securely attaches to the suit and offers clear visibility.
2. Approach Bee Hives Calmly and Gently
Bees are sensitive to sudden movements and vibrations. When approaching a hive, move slowly and deliberately. Avoid making loud noises that could agitate them. By being calm and gentle, you can minimize the chances of provoking defensive behavior from the honey bees.
3. Work During Appropriate Weather Conditions
Choose to inspect your hive on warm, sunny days when the bees are more docile. Cold or rainy weather can make honey bees more defensive and increase the risk of stings. It’s also advisable to avoid working with the bees during the late afternoon, as this is when they are busiest and more likely to become agitated.
4. Use Smoke Wisely
Smoke is an effective method for calming honey bees during hive inspections. It disrupts their communication and triggers them to consume honey, making them less inclined to sting. Use a bee smoker to emit cool, gentle smoke at the entrance of the hive and on top of the frames.
5. Practice Good Hive Management
Regular hive checks are essential for maintaining healthy colonies, but excessive intrusions can result in defensive behavior. Conduct inspections at appropriate intervals, and avoid unnecessary disturbances. By understanding the needs of your bees and working in harmony with them, you can reduce the likelihood of stings.
Remember, even with these precautions, occasional stings may still occur. Some individuals may be more sensitive to bee stings and could experience allergic reactions. When starting a hive, it’s crucial to know the signs of an allergic reaction and seek immediate medical attention if necessary.
Beekeeping is a fulfilling and rewarding hobby. By practicing proper protective measures and implementing gentle beekeeping techniques, you can enjoy the wonders of beekeeping while minimizing the risk of bee stings.
How to Start Beekeeping if You’re Afraid of Bees
Beekeeping can be a rewarding and fulfilling hobby, but it’s understandable that some beginners may feel anxious or fearful about working with bees. Overcoming these fears is not only possible but can lead to a deeper connection with these incredible pollinators. Here are some tips and encouragement to help you start beekeeping even if you’re afraid of bees:
Educate Yourself about Honey Bees
Knowledge about honey bees and their behavior is key to feeling more comfortable around them. Take the time to learn about the gentle nature of honey bees and their important role in our ecosystem. Familiarize yourself with their life cycle, hive dynamics, and the role of the queen, workers, and drones. By understanding their behavior and purpose within the hive, you’ll gain confidence in handling and managing bees.
Invest in Protective Beekeeping Gear
Having the right protective gear is essential for beekeepers, especially for those who are anxious about being stung. Purchase a high-quality beekeeping suit that covers your entire body, including a veil to protect your face. Wearing gloves and sturdy boots will provide added protection. When you feel physically shielded from the bees, you’ll be more at ease during hive inspections and other beekeeping tasks.
Start with a Calm Bee Breed
Consider starting your beekeeping journey with a bee breed known for its calm temperament. Some breeds, such as Italian bees or Carniolan bees, are known for being less aggressive and more docile. By working with bees that are generally less likely to sting, you can gradually build confidence and overcome your fear.
Gradual Exposure Therapy
Take small steps to gradually expose yourself to bees and their environment. Begin by spending time near the hive, observing the bees’ activities from a safe distance. As you become more comfortable, you can move closer to the hive while wearing protective gear. Eventually, you can start opening the hive and handling frames while following proper beekeeping techniques. Remember, slow and steady progress is more important than rushing into situations that may trigger fear or anxiety.
Seek Mentorship and Join Beekeeping Communities
Connecting with experienced beekeepers can provide valuable guidance and support as you embark on your journey. Seek out local beekeeping clubs or online communities. Mentors and fellow beekeepers can offer reassurance, share their own experiences, and provide practical advice to help you overcome your fears.
Remember, fear of bees is common, especially for beginners. With the right knowledge, tools, and support, you can overcome your fears and enjoy the incredible world of beekeeping. Embrace the learning process, be patient with yourself, and soon you’ll discover the joy and wonder that beekeeping can bring.
> “Fear can be like a bee buzzing around you. Stay calm, learn about the bee, and soon you’ll realize it’s just as scared of you as you are of it.” – Unknown
How to Start a Bee Hive Without Buying Honey Bees
Starting a bee hive without purchasing honey bees is a viable option for those who prefer alternative methods or want to save on costs. Here are two common approaches to consider:
1. Capturing a Swarm
One way to start a bee hive without buying honey bees is by capturing a swarm. A swarm is a natural phenomenon that occurs when a colony of bees splits from its original hive to form a new colony. Capturing a swarm not only saves money but also allows for the establishment of a genetically diverse colony. Here’s how you can capture a swarm:
– Research swarm season: Swarms usually occur in the spring when bee populations are expanding. Familiarize yourself with the typical swarm season in your area.
– Set up swarm traps: Create or purchase swarm traps consisting of wooden boxes or bait hives. Place them in strategic locations, such as near vegetation or existing hives.
– Use attractants: Increase the likelihood of attracting a swarm by using attractants such as lemon grass oil or old comb.
– Monitor and capture: Regularly check the traps and be prepared to capture the swarm when it arrives. Consult local beekeeping resources for guidance on safely transferring the swarm into a new hive.
2. Using Splits from Existing Hives
Another method to start a bee hive without buying bees is by creating splits from existing hives. This approach involves dividing a strong, healthy colony into multiple smaller colonies. Here’s how to do it:
– Select a healthy hive: Choose a hive that has a robust population, good brood production, and strong food reserves.
– Prepare hive components: Set up the necessary hive components, including additional bottom boards, hive bodies, frames, and lids, to accommodate the splits.
– Locate the queen: Locate the queen bee in the selected hive and place her in one of the new hives.
– Distribute resources: Distribute frames containing brood, honey, and pollen evenly among the new hives.
– Provide care and monitor: Monitor the new hives closely, ensuring they have sufficient resources and checking for signs of queen acceptance and hive strength.
When starting a bee hive without purchasing honey bees, it’s important to seek guidance from experienced beekeepers in your local community. They can provide valuable insights and support you throughout the process. Remember, beekeeping is a continuous learning journey, and these alternative methods can be enriching experiences for beginner beekeepers.
*Related keywords: swarm of honey bee, splits from existing bee hives, capturing a swarm, alternative options, starting a bee hive, beekeeping without buying bees.*
The Beekeeping Learning Continues
Beekeeping is a fascinating and rewarding hobby that offers endless opportunities for learning and personal growth. As a beginner beekeeper, your journey does not end once you have set up your first hive and harvested your first batch of honey. In fact, it is just the beginning! Beekeeping is a continuous learning process that requires ongoing education, access to resources, and mentorship.
Significance of Ongoing Education
To truly thrive as a beekeeper, it is essential to stay informed about the latest research, techniques, and best practices. Ongoing education can help you stay updated on new developments in the field of beekeeping and equip you with the knowledge and skills needed to address any challenges that may arise.
Seeking Resources
There are numerous resources available to help you expand your knowledge and enhance your beekeeping skills. Online magazines, blogs, and forums dedicated to beekeeping provide valuable information and insights from experienced beekeepers. If you want to become a beekeeper, joining local beekeeping clubs or associations allows you to connect with a community of like-minded individuals who can offer guidance and support.
The Power of Mentorship: You don’t want to go into beekeeping without guidance, find a mentor.
Consider seeking out a mentor who can share their expertise and provide guidance tailored to your specific needs. A knowledgeable beekeeper can offer practical advice, answer your questions, and assist you in navigating the intricacies of beekeeping. Whether it’s through an official mentorship program or informal networking, having someone to turn to for guidance can expedite your learning process and boost your confidence as a beekeeper.
Embrace the Learning Journey
Remember that beekeeping is a journey of continuous learning and growth. Embrace every opportunity to expand your knowledge, try new techniques, and discover innovative approaches to hive management. As you gain experience, you will develop your own insights and techniques that work best for your particular hive and location.
As part of online beekeeping, staying informed and connected in the ever-changing world of beekeeping is key. Invest in your beekeeping journey by seeking ongoing education, accessing valuable resources, and connecting with experienced mentors. With every step, you will become a more skilled and knowledgeable beekeeper, ensuring the success and vitality of your hives for years to come.
> “Beekeeping is a fascinating and dynamic journey, where there is always something new to learn and discover.” – Beekeeper’s Lab
FAQs
Q: Are you a beginner beekeeper and have more questions about how to start beekeeping? Ask in the comments below and I’ll do my best to answer!
Q: How do I start a beekeeping journal?
Starting a beekeeping journal is a great way to track your hive’s progress, record important observations, and plan future actions. Here’s how to get started:
1. Choose a journal format: You can use a physical notebook or an electronic journaling app, whichever works best for you.
2. Record hive details: Begin by noting down information about each individual hive, including its location, date of establishment, and the type of bees you have.
3. Document hive inspections: After each hive inspection, write down details about the health and condition of the hive, such as the number of frames with brood, honey stores, and any signs of disease or pests.
4. Track seasonal changes: Document the changes you observe in your hive throughout the seasons. Tally how often they collect nectar and pollen. Take note of flowering plants, nectar flows, and weather conditions that may impact your bees.
5. Set goals and record progress: Use your journal to set goals for your beekeeping journey. Track your progress towards these goals and record any adjustments or lessons learned along the way.
6. Include photos and sketches: Consider adding visual elements to your journal, such as photos of your hive, bee behavior, or drawings of hive layouts. These visuals can provide helpful references and add interest to your journal.
Remember, your beekeeping journal is a personal record of your experiences and observations. Regularly reviewing your entries will not only help you improve your beekeeping skills but also provide a valuable source of information for future reference.
Q: How often should I check my bee hive?
Regular hive checks are essential for maintaining healthy and thriving colonies. The frequency of hive checks may vary depending on the season and specific circumstances. Here are some general guidelines:
1. Spring and summer: During the active beekeeping season, it’s recommended to check your hive every 7 to 10 days. This allows you to monitor the hive’s growth, ensure sufficient honey stores, and spot any signs of pests, diseases, or queen-related issues.
2. Fall: As the bees prepare for winter, reduce the frequency of hive checks to once every 2 to 3 weeks. This is the time to assess the hive’s honey reserves, treat for mites if necessary, and make any necessary preparations for the colder months ahead.
3. Winter: During winter, when the bees are in a semi-dormant state, minimize disturbances and avoid unnecessary hive checks, as this can cause stress and disrupt their winter survival. However, it’s still important to monitor external factors like hive weight to ensure they have enough food stores.
It’s crucial to remember that each hive is unique, and the timing and frequency of inspections may vary depending on local climate, bee behavior, and individual hive conditions. Pay attention to your bees’ behavior and adjust your hive checks accordingly.
Q: Can I start beekeeping in an urban area?
Yes, you can definitely start beekeeping in an urban area! Bees are remarkably adaptable and can thrive in diverse environments, including cities. Here are a few key considerations for urban beekeeping:
1. Check local regulations: Before setting up your hive, familiarize yourself with any local regulations or restrictions regarding beekeeping. Some cities may have specific rules on hive placement, hive density, or neighbor notifications.
2. Assess available space: Evaluate the available space in your urban setting to determine the best location for your hive. Look for areas that receive adequate sunlight, have minimal foot traffic, and are shielded from strong winds.
3. Consider your neighbors: Communicate with your neighbors about your intention to keep bees and address any concerns they may have. Assure them that bees are generally docile and pose little risk when properly managed.
4. Provide water sources: Bees need access to water for hydration. Consider providing a water source in your urban beekeeping setup, such as a shallow bird bath with stones or floating cork pieces to prevent drowning.
5. Focus on pollinator-friendly planting: Maximize the forage available to your bees by planting a variety of pollinator-friendly flowers, herbs, and trees in your urban garden. This not only benefits your bees but also contributes to the overall health of the local ecosystem.
Q: What is beekeeping 101?
A: Beekeeping 101 refers to the basic principles and practices of beekeeping for beginners. It covers topics such as setting up a hive, managing bees, and harvesting honey.
Q: How do I start my own beekeeping hive?
A: To start your own beekeeping hive, you will need to acquire the necessary equipment such as the hive, protective gear, and tools. It’s also important to educate yourself about bee behavior and care, and to find a mentor in your area.
Q: What equipment will I need to start beekeeping?
A: Some essential equipment for beekeeping includes a hive (such as a top bar hive), protective clothing, a smoker, hive tools, and feeders. You may also need to purchase new equipment or used beekeeping supplies from experienced beekeepers.
Q: How do I get my bees for the hive?
A: There are several ways to obtain bees for your hive, including purchasing a colony from a local beekeeper, catching a swarm, or ordering a package of bees. It’s important to ensure that the bees are healthy and disease-free.
Q: Do I need to take a beekeeping class or course before starting my own hive?
A: While it’s not mandatory, taking an online beekeeping course or attending a beekeeping class can provide valuable knowledge and practical skills for beginners. Learning from experienced beekeepers is also beneficial.
Q: What are some common challenges faced by new beekeepers?
A: New beekeepers may encounter challenges such as understanding bee behavior, maintaining a healthy colony, and managing pests and diseases. It’s important to seek guidance and continuously educate yourself.
Q: Should I start with one or two bee colonies?
A: It’s recommended for new beekeepers to start with at least two bee colonies. This can help provide a comparison between the colonies and offer support if one colony is struggling.
Q: How do I know if my queen bee is laying eggs?
A: By observing the brood pattern in the hive, beekeepers can determine if the queen is laying eggs. A healthy brood pattern indicates that the queen is active and the colony is thriving.
Q: What is the significance of bee space in beekeeping?
A: Bee space refers to the amount of space that bees need to move freely within the hive. Maintaining proper bee space is crucial to prevent bees from building excess comb or causing hive disturbances.
Q: How can I find a mentor in my area to assist with beekeeping?
A: You can connect with local beekeeping associations or reach out to experienced beekeepers in your area to find a mentor. Having a mentor can provide valuable guidance and support as you start your beekeeping journey.
Starting beekeeping in an urban area may require some additional considerations, but with proper planning and management, it can be a rewarding and enriching experience. Happy beekeeping in the city!